SUPPORT -
Comprehensive Guide: How to Set Up and Optimize a Venue
Comprehensive Guide: How to Set Up and Optimize a Venue
Basic guide for setting up your first venue on the QZee platform.
Jun 10, 2024
Platform

Log In and Navigate to Venue Settings
Log in to your account on the QZee platform.
Click on the "Venue" tab in the left-hand sidebar to access the venue settings.

Upload Venue Cover and Logo
Click on the "Upload" button under "Venue cover" to add an image representing your venue. Ensure the image size is at least 1920x450 pixels and is in one of the following formats: .png, .jpg, .jpeg, .svg, or .gif.
Click on the "Upload" button under "Venue logo" to add your venue's logo. The logo size should be up to 500x500 pixels and in one of the following formats: .png, .jpg, .jpeg, .svg, or .gif.
Enter Venue Details
Category: Select the appropriate category for your venue from the dropdown menu. Example: "Barber."
Venue Name: Enter the name of your venue in the "Venue" field. Example: "CDF Barber."
Venue Address: Enter the full address of your venue. Example: "CF10 1BB, 8-10 High St, Cardiff."
Email: Enter the contact email for your venue.
Phone: Enter the contact phone number for your venue.
Website URL: Enter the URL of your venue's website, if available.
Description: Provide a brief description of your venue.
Set Opening Hours
For each day your venue is open, toggle the switch to the right (yellow).
Enter the opening and closing times for each day. Use the 24-hour format (HH). Example: Opening time is 16:00 and closing time is 16:00 for Monday to Friday.
If your venue is closed on a specific day, ensure the toggle switch is off (gray).
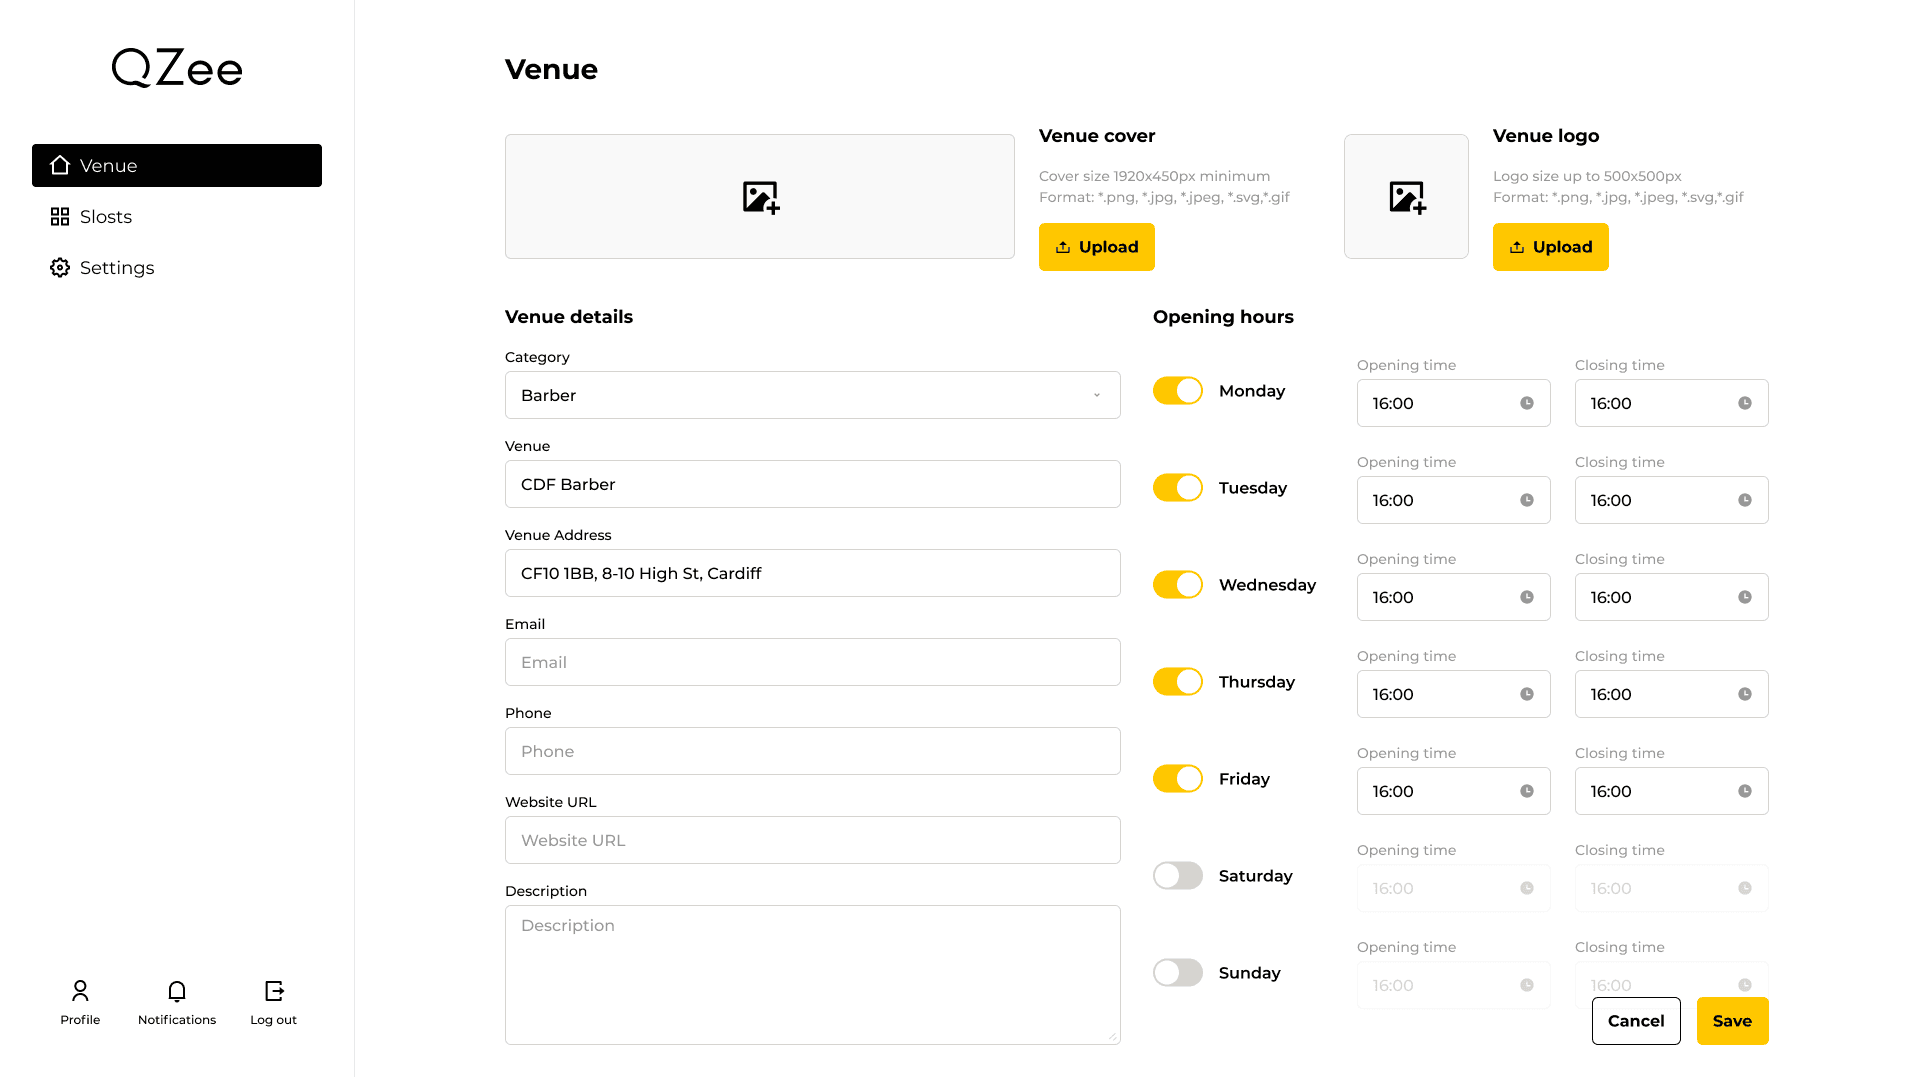
Save Changes
After filling in all the details, click the "Save" button at the bottom right to save your venue information.
Review and Publish
Review all the details entered to ensure accuracy.
Once satisfied, look for any option to publish or confirm your venue details to make them live on the platform.
By following these steps, you should be able to add all the necessary details and get your venue published on the QZee platform. If there are any specific fields or additional options not covered in this guide, refer to the platform's help or support section for further assistance.